This article will explain how images are used and linked between ARTBUTLER and your computer or server.
Important
This process is normally set-up with the first installation of ARTBUTLER.
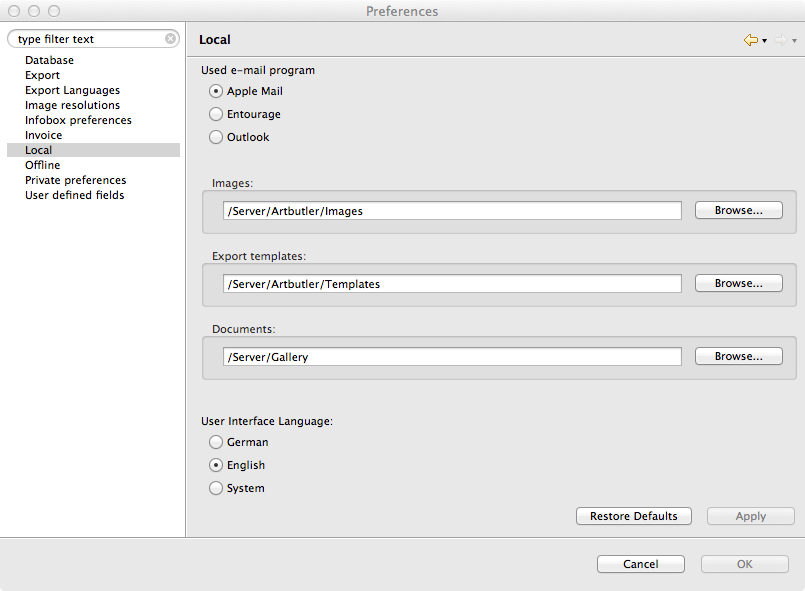
When you add an image to an artwork in ARTBUTLER, it can come from anywhere on your computer. Once you have set-up the central image folder, the software will copy the file you have chosen, save it in your chosen central location and link to that copied version.
The typical location for your central image folder is: Your Server/Artbutler/Images
You can choose a location anywhere else in your local network however, that is accessible for every ARTBUTLER user.
Linking Your Image Folder to ARTBUTLER
- If not yet already selected during the First Installation, select where your images will be stored. They should be stored on your server in a folder titled Images, within another folder titled artbutler.
- Go to Preferences within the ARTBUTLER menu.
- Select the Local tab on the left hand side menu.
- On the right hand side under Images, click the Browse button and select the folder you have just created. Click Open and then OK .
Note: Make sure all computers running ARTBUTLER use the same shared folder for images, e.g. a folder on your server.
Changing the Resolution of Your Images
- Go to Preferences within the artbutler menu.
- Select the Image Resolutions tab on the left hand side menu.
- You can enter the maximum image size in pixels for the different image versions that will be created in artbutler.
- When completed, click OK .
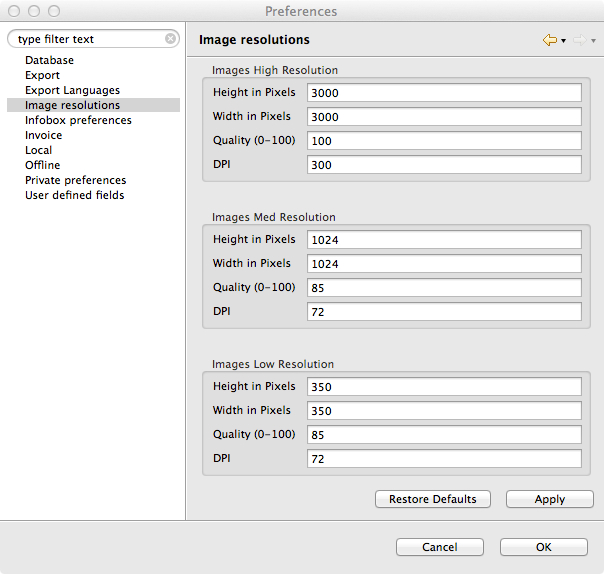
Note: We usually don’t recommend that you need to change these settings.

