
This article will show you how to add a work to ARTBUTLER. It will explain where to add general information, as well as how to add dimensions, prices and images. It will explain how to use the multi-lingual technique feature, how to add costs and how to customise the work status.
1. Adding a Work
General
- Go to Works in your left hand side navigation. Select the New
 button at the top of your right hand side list view.
 - A pop-up window will appear for you to create the inventory number for the work. Select the artist and work type. Click Suggest for the next sequential inventory number and add a 1 in the second empty field if the work is an edition, series, or other form of multiple, before selecting Create. This is explained further in Creating Inventory Numbers.
- A blank work file will appear in your middle detail view. Add the title of the work. An alternative title can be added if the work has more than one name, or if the work’s title can be translated into other languages.
- Add the year/s and the title of the Cycle if it belongs to one.
- If the work belongs to an edition or a series, add a ‘1’ in the edition field.
- Next you can add the work’s technique. Please read below how to create new techniques in ARTBUTLER.
- Once you have created the techniques you need, click the arrow at the far right of the technique field, a pop-up window will appear.
- You can scroll and search the techniques, or add them free hand using their short hand codes you have assigned them, in the open field at the top of the window. When ready, click Apply.
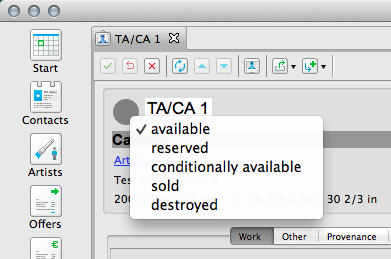
- A drop-down menu will appear and you can select from the list. Once selected, the dot will change colour depending on which status you have chosen.
- If you wish to add more status options, please read below.
Dimensions
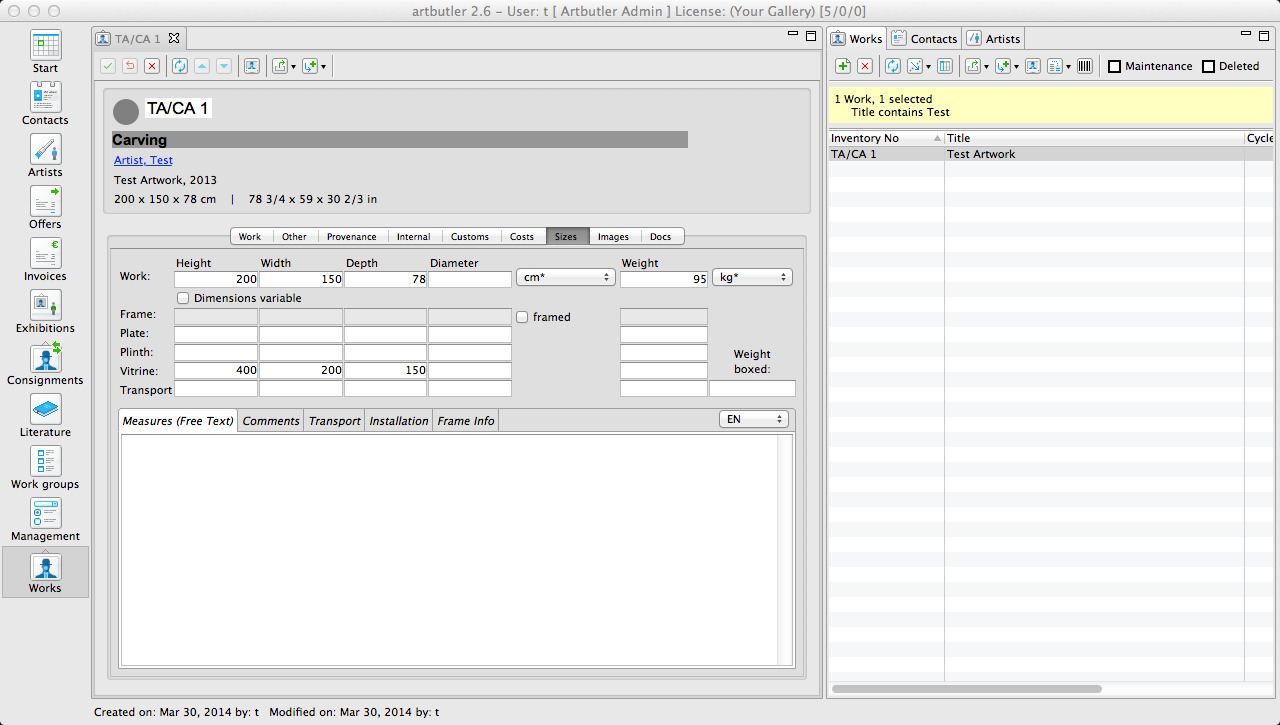
- Next, click on theSizes tab to add the dimensions of the work.
- You can add the height, width, depth and/or diameter and weight of the work if applicable, or select Dimensions Variable, if the dimensions vary depending on the installation of the piece.
- If the work is framed, select the framed square. The frame fields will become available to be filled out.
- You can add all this information for plates, plinths, vitrines and for the transport also.
- At the bottom of the view is the free text field. Anything you write here will override what you have specified above and will automatically be exported. You can give very detailed dimension details about artworks with multiple pieces or components, or installations.
- There are tabs next to the free text field, where you can add further general comments, as well as comments about transport, installation and frame information.
Prices
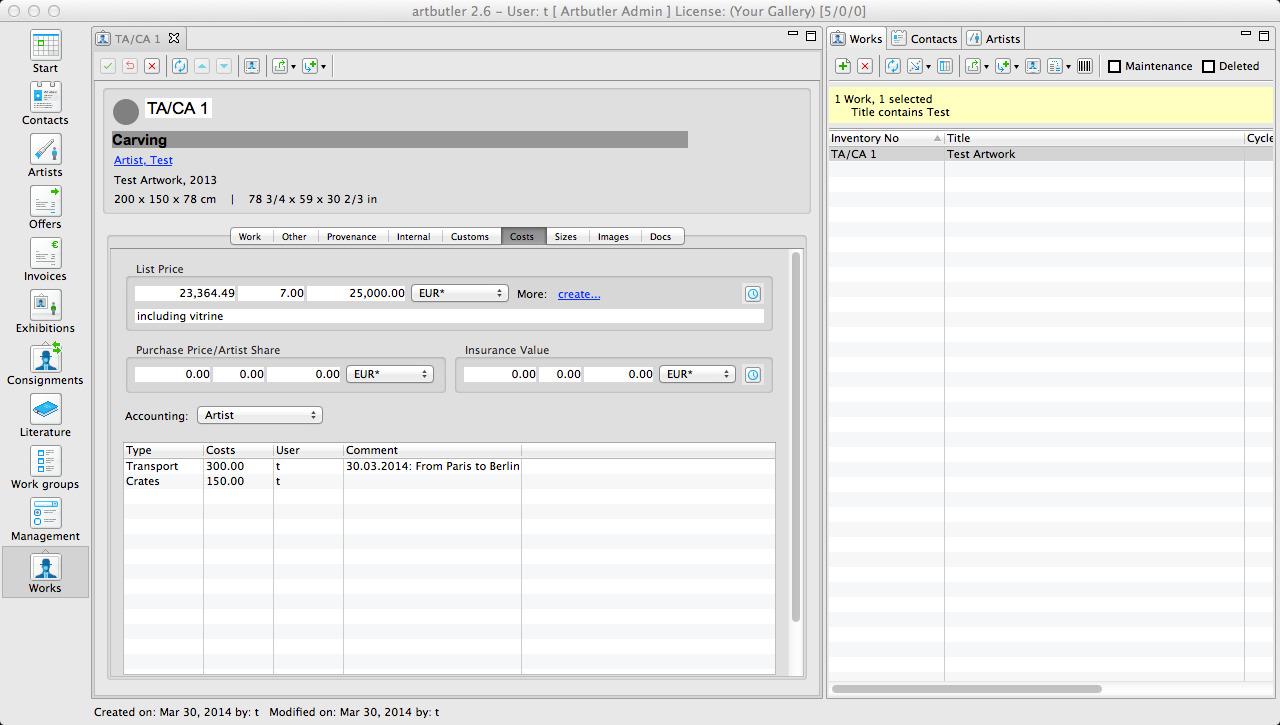
- Next, click on the Costs tab to add the price and any costs to the artwork.
- Under List Price you can add the value of the artwork. Click on the empty white field and a pop-up window will appear.
- You can either add the net or gross value first, followed by the tax percentage and ARTBUTLER will automatically calculate the other amount for you.
- Here you can also switch between currencies using the drop-down menu under currencies and ARTBUTLER will automatically generate the new amount based on the current exchange rate.
- You can add a comment to the list price if necessary e.g: including vitrine. Once you are finished, click Apply .
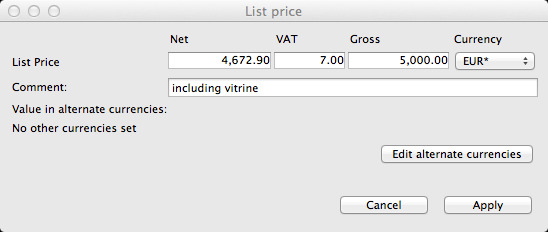
- You can add the purchase price or artist share and insurance value if necessary, the same way as with the list price.
- To select the accounting, click on the drop-down tab.
- You can select ‘Artist’ or ‘Consignment’, depending on who you need to pay after the sale, or select Accounted if they have already been paid and/or nobody else needs to receive their share.
- You can add any costs you have spent on the artwork in the bottom field.
- To add new costs to the system, please read below.
- Once you have added all costs you need in the management section, scroll down and click the Add button. A pop-up window will appear.
- Click the drop-down menu next to Type and select the cost you would like to add.
- Add the net cost amount in the open field and add a comment if necessary and click Apply.
Images
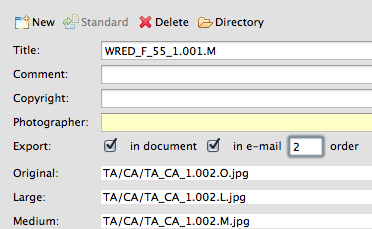
- Click on the Images tab to add images to the artwork.
- If the screen is blank, you can simply drag images into that field to add them to the work.
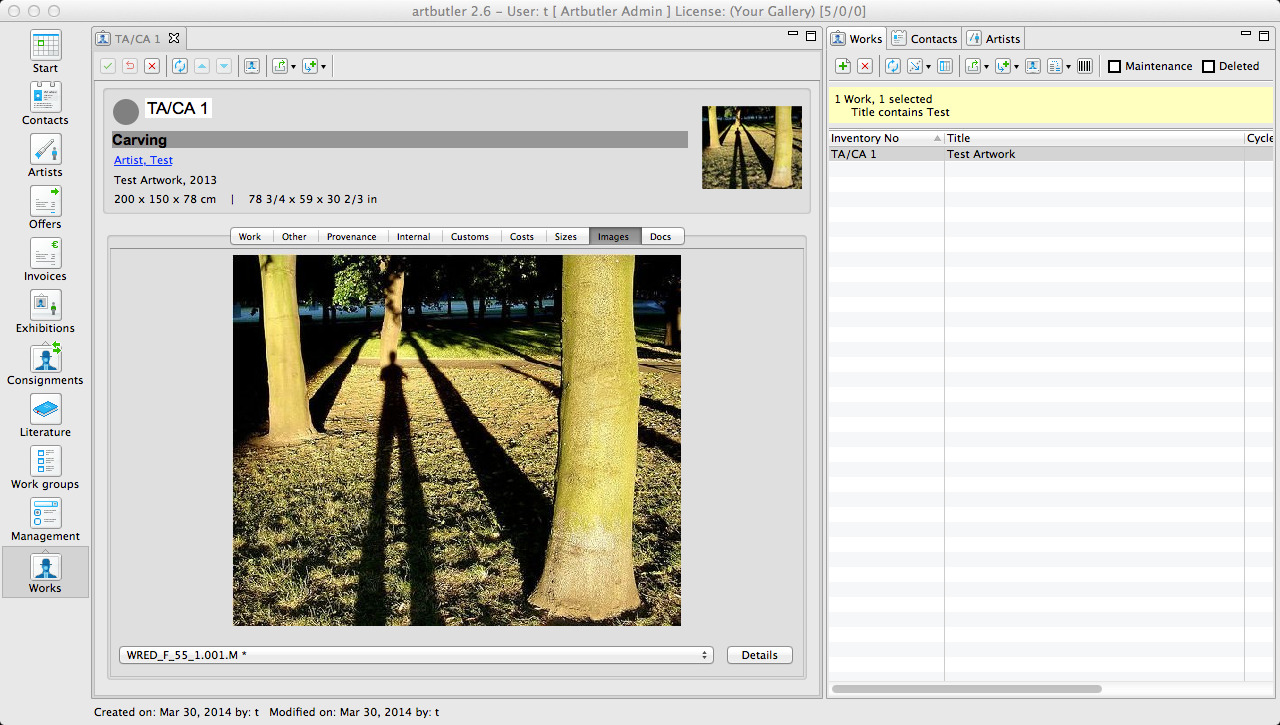
- If the screen is filled with text, you are in the detail view. you can add and edit the images from there.
- You can switch between these two views, by clicking either the Picture or Detail button at the bottom right hand side of the view. The word will change depending on which view mode you are in.
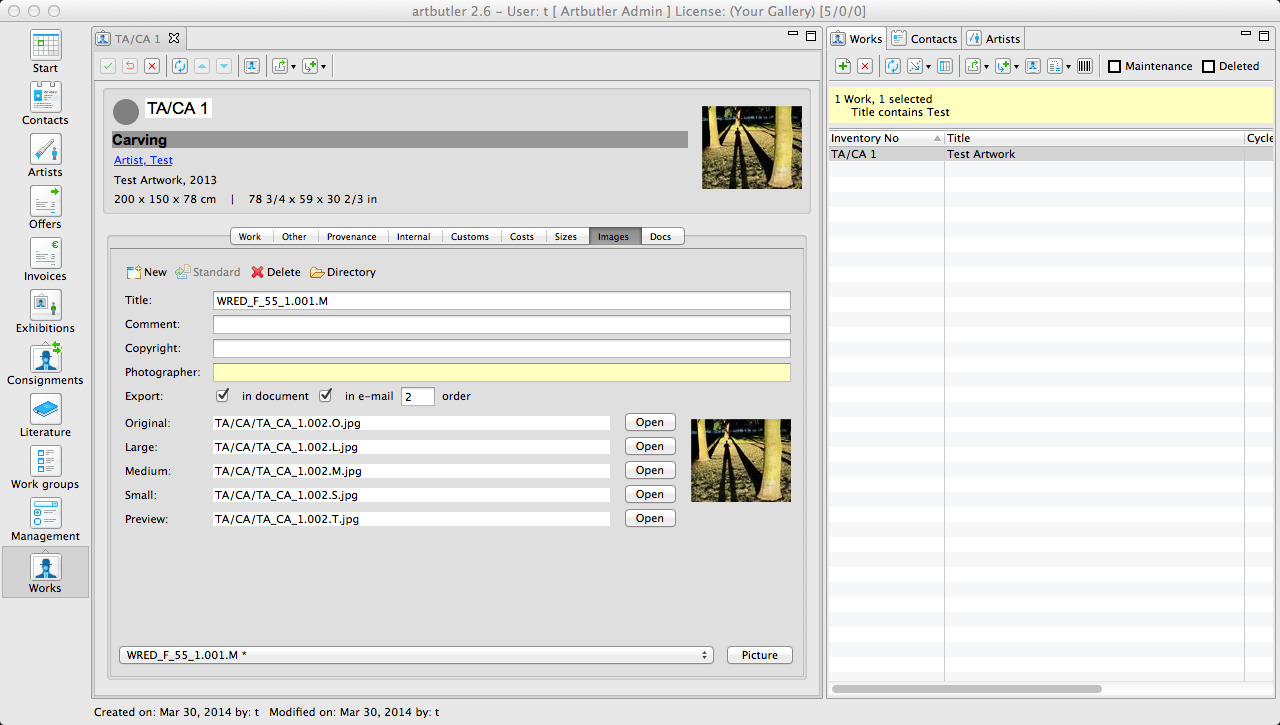
- To add images from your detail view, click the New button at the top left.
- A pop-up window will appear, where you can select the image you want to add from anywhere on your computer or network. Once added, click Open.
- You can add several images for each artwork and reorder them as you wish.
- To reorder them, simply change the number in the open field next to order, to the place number you would like the images to be in. Each image needs to have its number changed to the order you want.
2. Adding a Technique
In ARTBUTLER techniques can be added once into the system and assigned a shorthand code. This code can then be used in every language you might want to use with ARTBUTLER, so it becomes very easy to translate between the different languages you want to use. On top of this, using a short hand, makes it very fast and efficient in general when adding the techniques to artworks. Furthermore, the way the techniques are written is standardised and you stop the risk of making typos.
- Go to theManagement tab in your left hand side navigation.
- Select theTechnique tab at the top of the page.
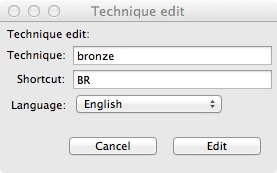
- Click theNew button to add a new technique, a pop-up window will appear.
- Type in your new technique and give it a shortcut. Choose which language it is in before clickingCreate.
- e.g: The technique might be ‘on Canvas’, the shortcut might be ‘/C’ and the language might be english.
- If you want to export your work information in more than one language, you should add the new technique in the other languages at the same time.
- e.g: In german the same technique would be ‘auf Leinwand’ the shortcut would still be ‘/C’ and you would then select deutsch as the language and click Create.
- Once you have added the techniques in the different languages you can go back to the work profile and add them to the work.
3. Adding Costs
- Go to theManagement tab in your left hand side navigation.
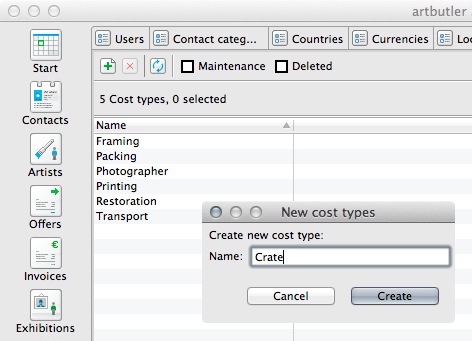
- Select the Cost Types tab at the top of the page.
- Click theNew button to add a new cost type, a pop-up window will appear.
- Type in the new cost e.g: Framing, Restauration, or Shipping, and clickCreate.
- Once you have added the costs you need, you can go back to the work profile and add them to the work.
4. Adding New Statuses
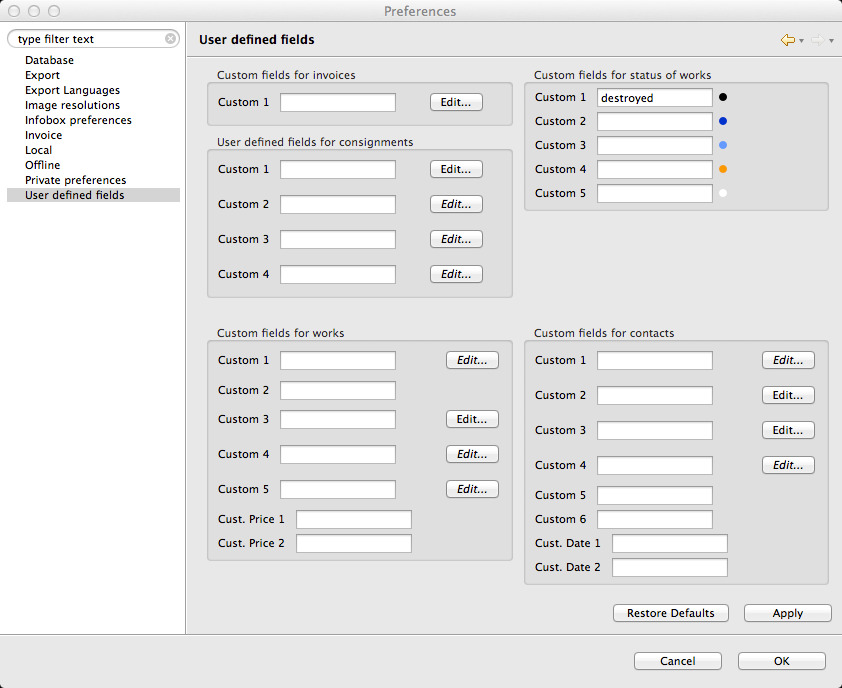
- From the ARTBUTLER menu at the top of the screen, go toPreferences.
- Select the User Defined Fields tab from the left hand side menu.
- At the top right hand side of the window, you can add up to 5 new statuses under Custom Fields for Status of Works.
- Once you have added what you want, clickApply.