
Overview
Assign any number of images to your artworks on the Images tab by linking image files. Artbutler automatically copies these files to your image folder and creates different versions for different tasks.
Link images
- To link images, drag and drop image files to the image tab in the default view.
- Alternatively, you can select and link images using the plus button
 .
.

Add any number of images to your works.
List view
To view all images and corresponding information (title, comment, copyright, photographer, export options, and original file name), switch to list view by clicking the List button.
Put images in a specific order by moving them via drag and drop or by using the  double arrow symbols.
Edit image information in a separate window by double clicking any image or clicking the  pencil icon. You may then specify title, notes, copyright, and the photographer.
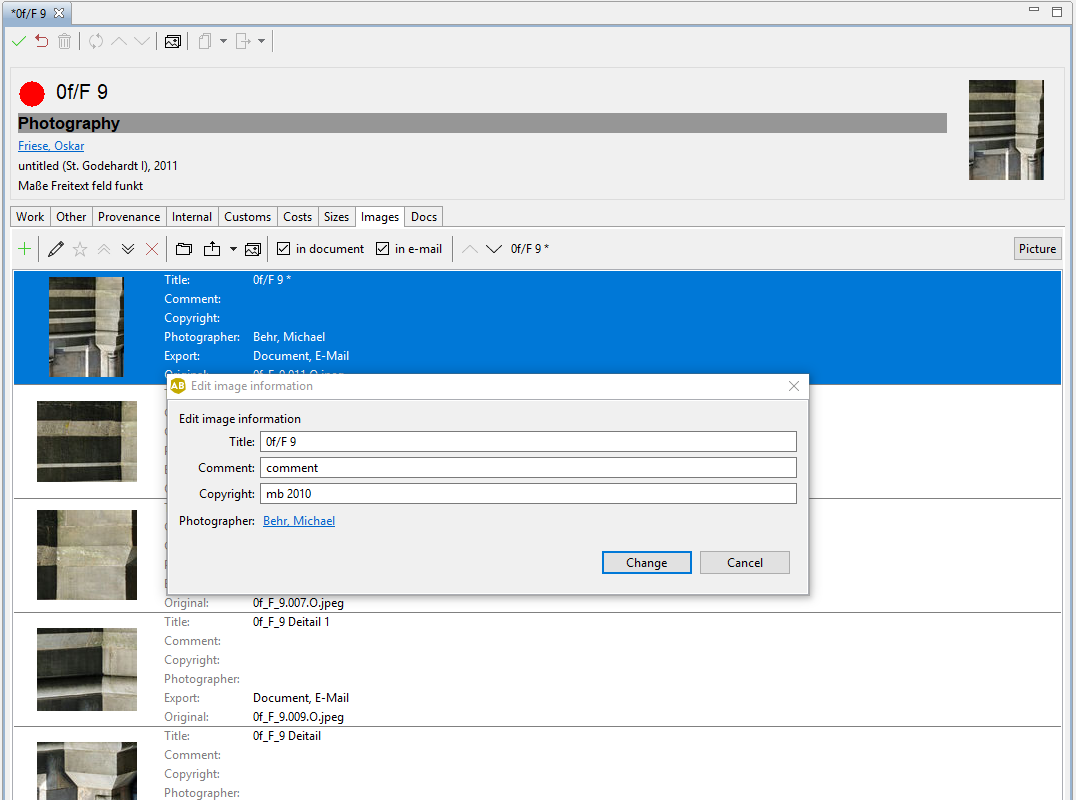
The photographer box is yellow, which means you can link it to another record, in this case to one of your contacts. Drag and drop the specific contact from your contact list on the right into the yellow field or enter the name manually if it is not available there.
ARTBUTLER automatically creates different sized images, when you link an image. You can open any version by right-clicking any image or by clicking the  file icon. In addition to the image’s original size, ARTBUTLER provides the following sizes: large, medium, small, and preview. Find more information below under Image directory.
Standard image and export options
The first image you add to an artwork will be used as the default image. The default image is the work’s main image and is available for all exports. You can easily identify this image due to the little star at the end of its title. It is always displayed at the top right in your work data record.

If you wish to set a different image as default, click the desired image and then click the star symbol  at the toolbar at the top.
The export features allow you to determine whether an image should be used for exports. Simply check or uncheck the corresponding box In document or In email.
Find more information on how to export documents in the following articles: Adapting export templates und Working with templates.
Image directory
ARTBUTLER will manage all image files for you and stores them in a designated image directory. When you add an image, ARTBUTLER will automatically create a folder there for each artist (using the Artist ID) including subfolders for specific work types.
The example below shows a folder containing your contact’s images and a folder of an artist with the artist id AA (the initials) that contains all of AA’s artwork images of the artwork type Ph for Photography.

ARTBUTLER saves 5 image versions in different sizes per art work for various applications.
O – Original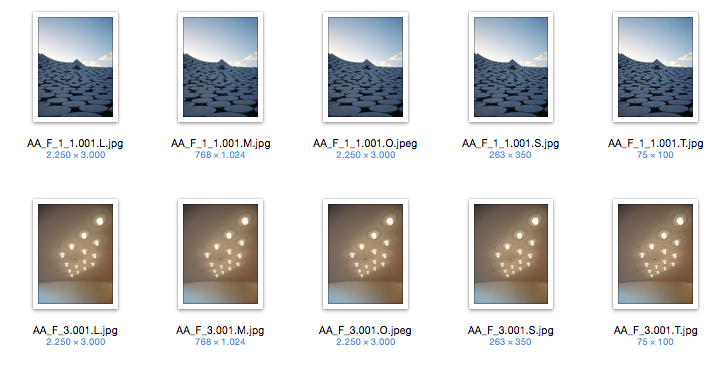
L – Large
M – Medium
S – Small
T – Thumbnail
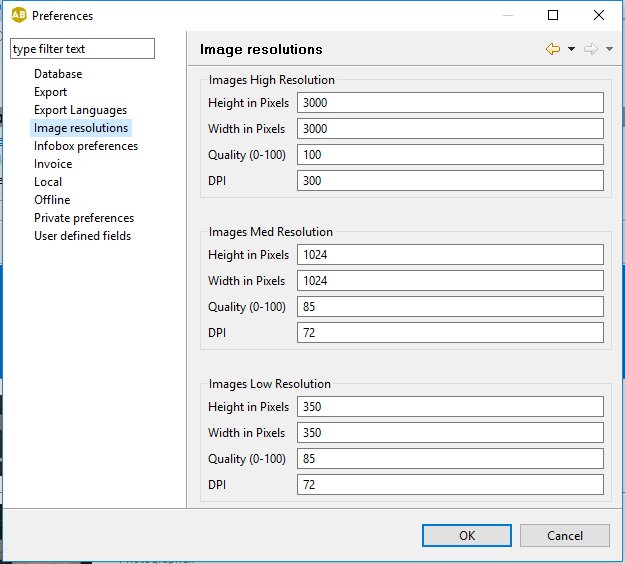
If required, you can adjust the specifications for the sizes L/M/S. New images will then be created using the new values. Go to the settings in ARTBUTLER’s menu artbutler > Preferences > Image Resolutions.