
How can we help you?

Working with Templates

This article will explain how templates are used and linked between artbutler and your computer or server.

Overview

When you have finalised editing the templates you want to use with ARTBUTLER, you should save your final versions in your central template folder. You can then create export documents with these templates and set up permanent export paths that link to this central folder and to each template within it.

The typical location for your central template folder is: Server> artbutler>Templates

Important

This process is normally set-up with the first installation of ARTBUTLER.

Video

The following video shows you how to link a template within seconds.


Linking Your Template Folder to ARTBUTLERLocal Preferences
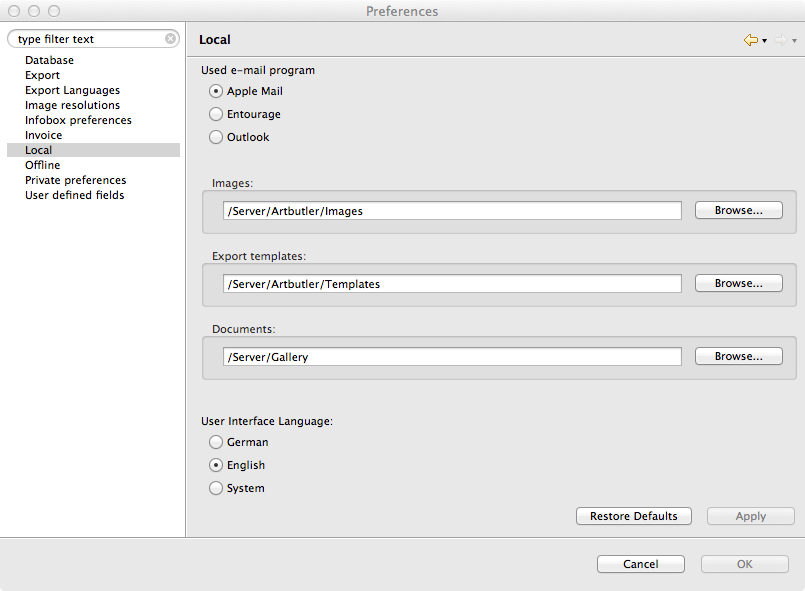
  1. If not yet already selected during the First Installation, select where your templates will be stored. They should be stored on your server in a folder titled Templates, within another folder titled ARTBUTLER.
  2. Go to Preferences  within the ARTBUTLER menu.
  3. Select the Local  tab on the left hand side menu.
  4. On the right hand side under Export Templates, click the Browse  button and select the folder you have designated for your templates. Click Open  and then OK .


Using Your Templates

To create an export with ARTBUTLER:
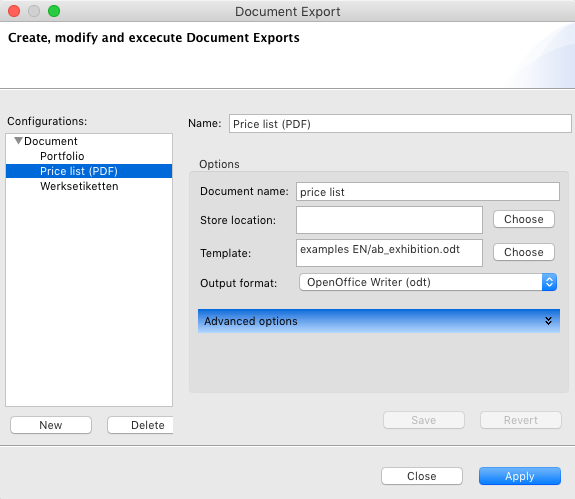
  1. Select where [which section of artbutler] you want to export from and what sort of template it will be. e.g: a price list document from Exhibitions.
  2. In this case, go to Exhibitions .
  3. Once the exhibition has been set up and is complete, click on the Exports  export button in your detail view.
  4. Go to Documents  in the drop down menu and then Documents…  within the next drop down menu.

Info

The following procedure applies to the other export formats like TEXT, LABEL, CSV as well, some of them offering additional settings required for specific formats.

  • A pop-up window will appear, where you can create a new export. Select New  at the bottom left hand side of the window and a new blank export field will appear.
  • You can fill out all the details in the blank spaces on the right hand side. Give the export a name. e.g: Exhibition Price List, and click Save .
  • Choose a Document Name. This is a prompt so you know how to title your saved documents in the future. A rule for the file names e.g: Date_Artist_Exhibition.
  • Select the Choose  button next to the blank Template field and select the template you wish to use for the export. Select the output format you wish to work in: Odt. Microsoft Word, or PDF.
  • When finished, click Save  and Apply .
  • Now when you go back to the Exports export button, your export will appear in the drop down menu, in this case, Exhibition Price List.
  •  If you click directly on the name, ARTBUTLER will begin the export directly, so you do not need to relink the template again in the future. This process applies for all template exports you want to do in any section of ARTBUTLER.
  •  

    Related articles: